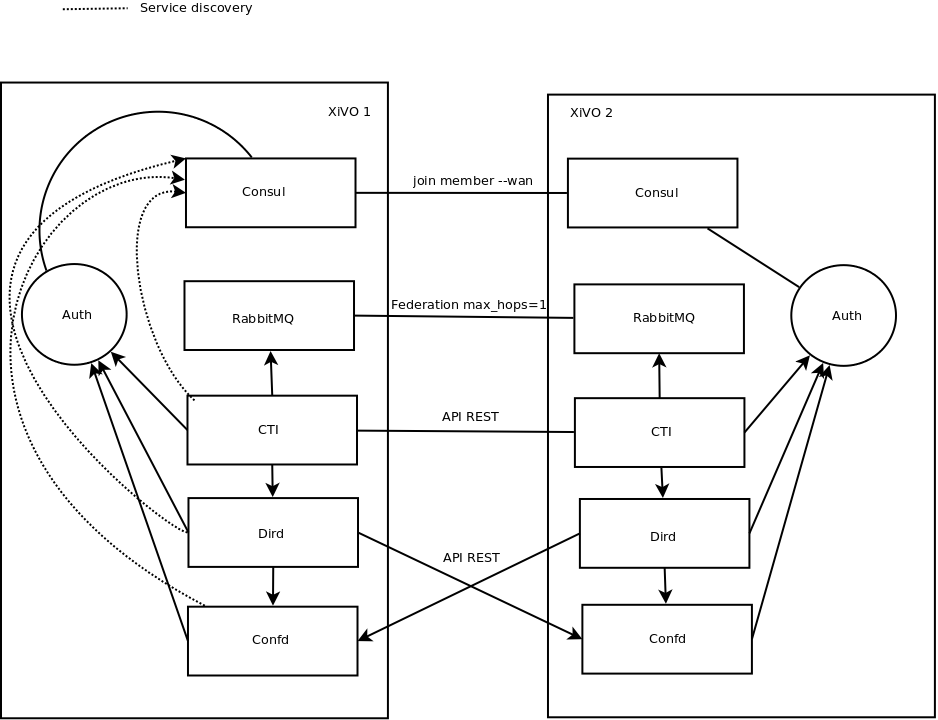
Contact and Presence Sharing
XiVO allow the administrator to share presence and statuses between multiple installations. For example, an enterprise could have a XiVO in each office and still be able to search, contact and view the statuses of colleagues in other offices.
This page will describe the steps that are required to configure such use case.
Prerequisite
- All XiVO that you interconnect should be on the same version
- This configuration is only possible with XiVO 15.19 and above
- All ports necessary for communication should be open Network
Warning
If you are cloning a virtual machine or copy the database, the UUID of the two XiVO will be the same, you must regenerate them in the infos table of the asterisk database and restart all services. You must also remove all consul data that included the old UUID.
Warning
Telephony will be interrupted during the configuration period.
Warning
The configuration must be applied to each XiVO you want to interconnect. For example, if 6 different XiVO are to be connected, the configuration for all other XiVO should be added. This does not apply to the message bus which can use a ring policy, each XiVO talking to its two neighbours.
Warning
You should use your firewall to restrict access to the HTTP ports of consul and xivo-ctid, because they don’t have any authentication mechanism enabled.
Note
In an architecture with a lot of XiVO, we recommend that you centralize some services, such as xivo-dird, to make your life easier. Don’t forget redundancy. This applies also to RabbitMQ and Consul. In this case, the configuration will have to be done entirely manually in YAML config files.
For this procedure, the following name and IP addresses will be used:
- XiVO 1: 192.168.1.124
- XiVO 2: 192.168.1.125
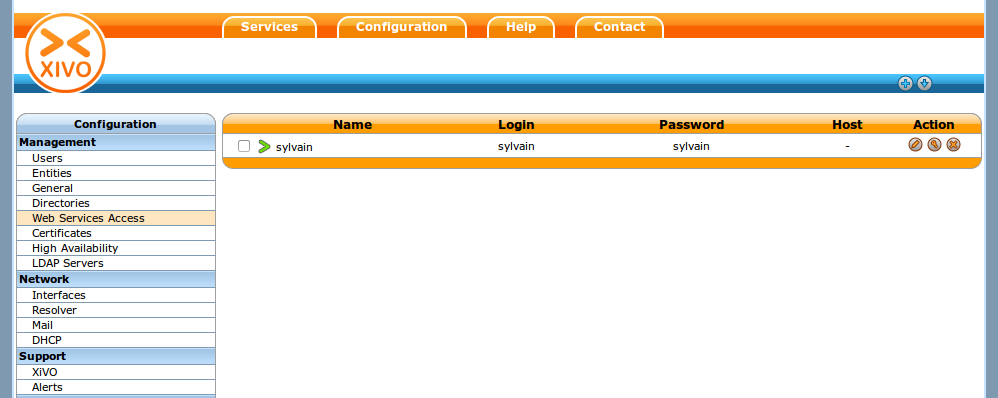
Add a Web Service User
The first thing is to make XiVO accept remote connections to your internal users directory. For this, you must create a Web service access by authorizing either an IP address or a login/password.
This can be done in

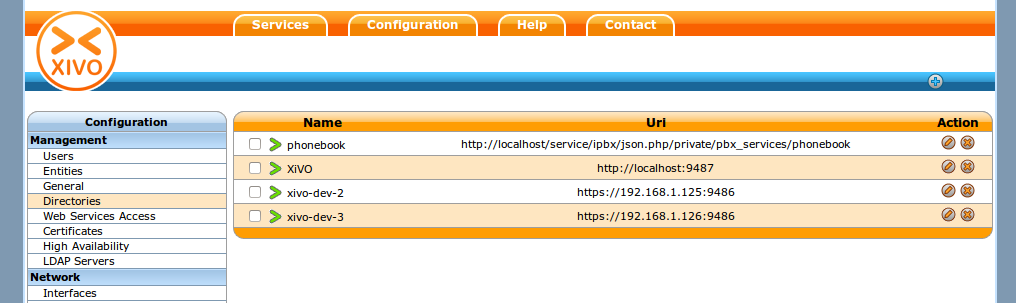
Configuring the directories
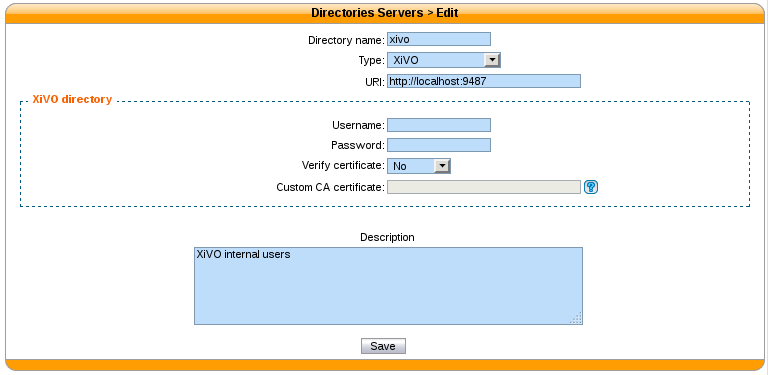
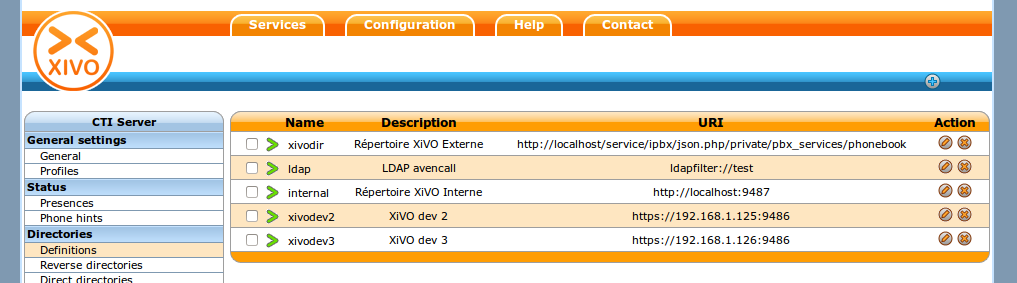
Add New Directory Sources for Remote XiVO
For each remote XiVO a new directory has to be created in
Note
We recommend doing a working configuration without certificate verification first. Once you get it working, enable certificate verification.
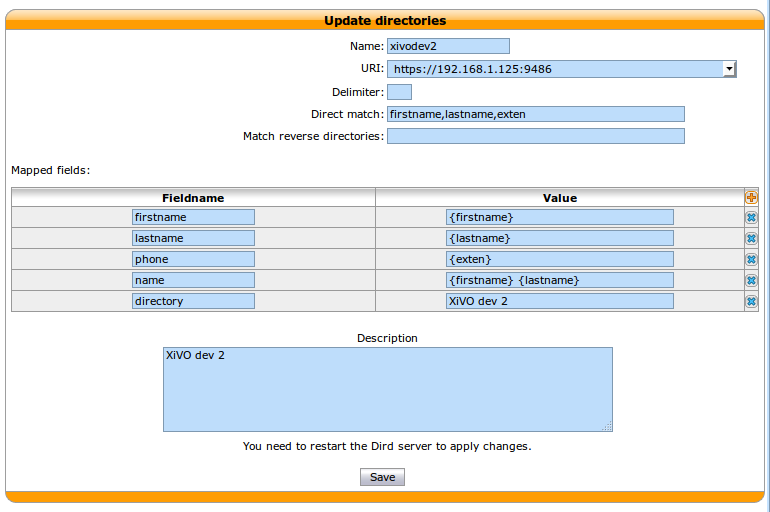
Add a Directory Definition for Each New Directories
To and a new directory definition, go to
In each directory definition, add the fields to match the configured Display filters
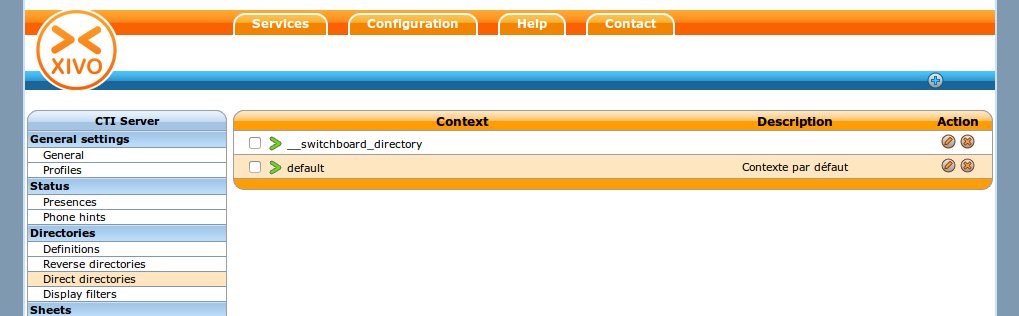
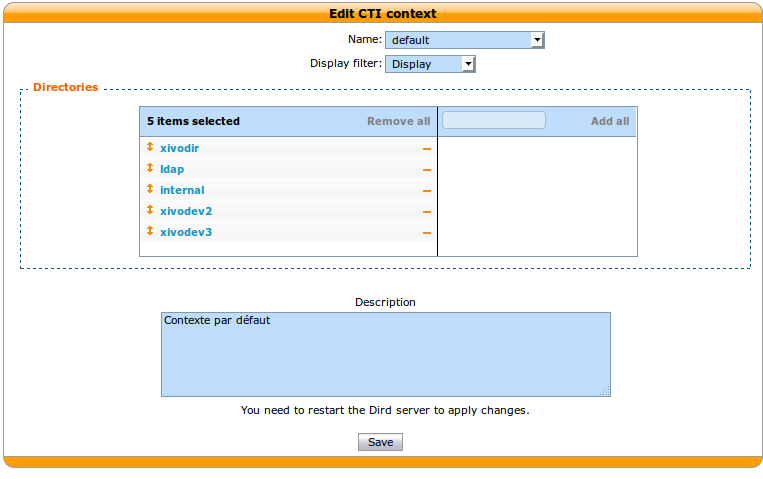
Add the New Definitions to Your Dird Profiles
At the moment of this writing xivo-dird profiles are mapped directly to the user’s profile. For each internal context where you want to be able to see user’s from other XiVO, add the new directory definitions in .
Restart xivo-dird
To apply the new directory configuration, you can either restart from:
- on the command line service xivo-dird restart
Check that the Configuration is Working
At this point, you should be able to search for users on other XiVO from the People Xlet.
Configuring RabbitMQ
Create a RabbitMQ user
rabbitmqctl add_user xivo xivo
rabbitmqctl set_user_tags xivo administrator
rabbitmqctl set_permissions -p / xivo ".*" ".*" ".*"
rabbitmq-plugins enable rabbitmq_federation
Restart RabbitMQ
service rabbitmq-server restart
Setup Message Federation
rabbitmqctl set_parameter federation-upstream xivo-dev-2 '{"uri":"amqp://xivo:xivo@192.168.1.125","max-hops":1}'  # remote IP address
rabbitmqctl set_policy federate-xivo 'xivo' '{"federation-upstream-set":"all"}' --priority 1 --apply-to exchanges
Configure xivo-ctid
Create a Custom Configuration File
Create a configuration file for xivo-ctid, e.g /etc/xivo-ctid/conf.d/interconnection.yml
rest_api:
  http:
    listen: 0.0.0.0
service_discovery:
  advertise_address: 192.168.1.124  # IP address of this XiVO, reachable from outside
  check_url: http://192.168.1.124:9495/0.1/infos
Restart xivo-ctid
service xivo-ctid restart
Check That Service Discovery is Working
apt-get install consul-cli
consul-cli agent-services --ssl --ssl-verify=false
The output should include a service names xivo-ctid with an address that is reachable from other XiVO.
{"consul": {"ID": "consul",
            "Service": "consul",
            "Tags": [],
            "Port": 8300,
            "Address": ""},
 "e546a652-e290-47e2-8519-ec3642daa6e6": {"ID": "e546a652-e290-47e2-8519-ec3642daa6e6",
                                          "Service": "xivo-ctid",
                                          "Tags": ["xivo-ctid",
                                                   "607796fc-24e2-4e26-8009-cbb48a205512"],
                                          "Port": 9495,
                                          "Address": "192.168.1.124"}}
Configure Consul
Backup Consul Data
This backup is not a precaution, we are going to remove all consul data.
xivo-backup-consul-kv -o /tmp/backup-consul-kv.json
Stop XiVO
xivo-service stop
Remove All Consul Data
rm -rf /var/lib/consul/raft/
rm -rf /var/lib/consul/serf/
rm -rf /var/lib/consul/services/
rm -rf /var/lib/consul/tmp/
Configure Consul to be Reachable from Other XiVO
Add a new configuration file /etc/consul/xivo/interconnection.json with the following content where advertise_addr is reachable from other XiVO.
{
"client_addr": "0.0.0.0",
"bind_addr": "0.0.0.0",
"advertise_addr": "192.168.1.124"
}
Check that the Configuration is Valid
consul configtest --config-dir /etc/consul/xivo/
No output means that the configuration is valid.
Start Consul
service consul start
Restore consul data
xivo-restore-consul-kv -i /tmp/backup-consul-kv.json
Start XiVO
xivo-service start
Join the Consul Cluster
Join another member of the Consul cluster. Only one join is required as members will be propagated.
consul join -wan 192.168.1.125
Check that Consul Sees other Consul
List other members of the cluster with the following command
consul members -wan
Check consul logs for problems
consul monitor
Check That Everything is Working
There is no further configuration needed, you should now be able to connect your XiVO Client and search contacts from the People Xlet. When looking up contacts of another XiVO, you should see their phone status, their user availability, and agent status dynamically.
Troubleshooting
Chances are that everything won’t work the first time, here are some interesting commands to help you debug the problem.
tail -f /var/log/xivo-dird.log
tail -f /var/log/xivo-ctid.log
tail -f /var/log/xivo-confd.log
consul monitor
consul members -wan
consul-cli agent-services --ssl --ssl-verify=false
rabbitmqctl eval 'rabbit_federation_status:status().'
